
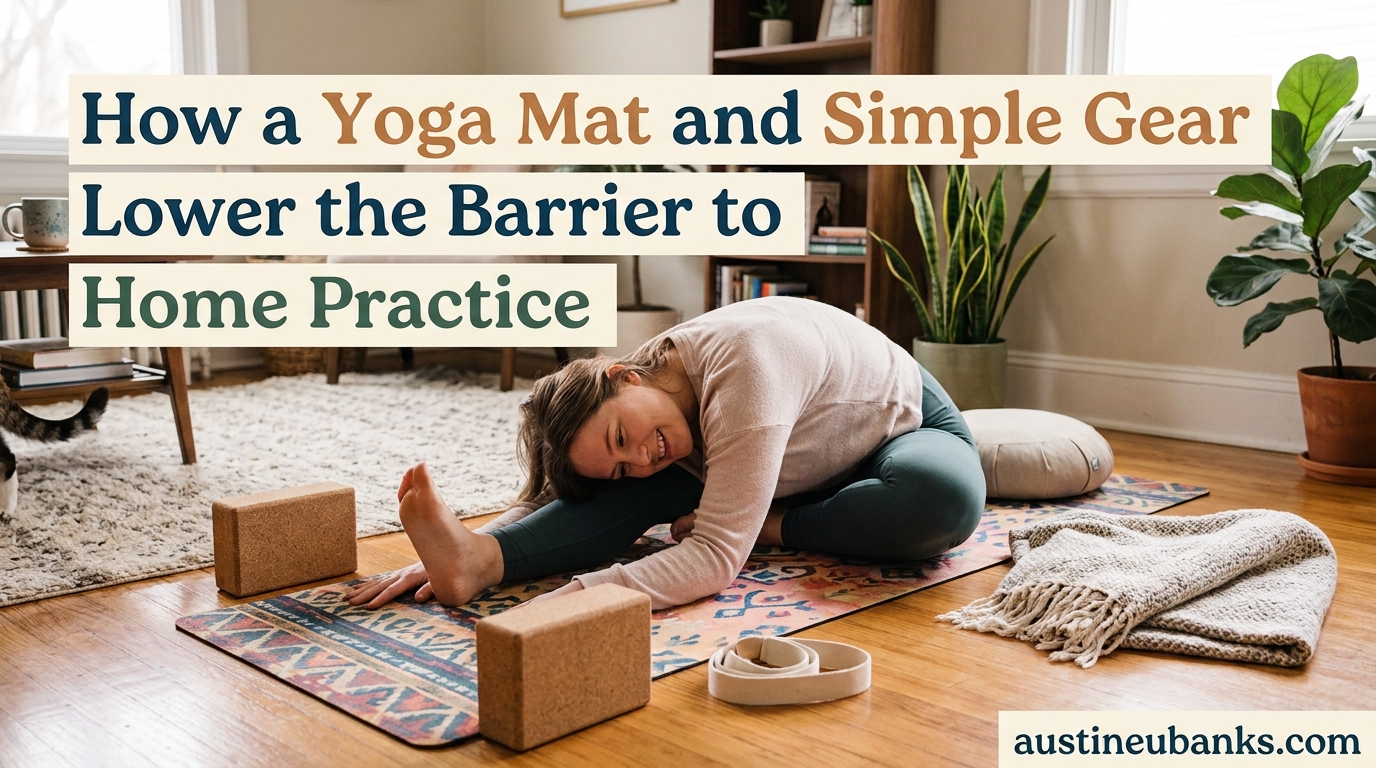
A yoga mat provides a defined, non-slip surface that transforms any floor space into a safe practice zone, instantly removing the excuse that you do not have the right space or equipment to practice at home. Simple gear like blocks, a strap, and a blanket reduce friction at three levels: physical (cushioning and grip prevent discomfort), environmental (easy storage means the mat never becomes clutter), and psychological (unrolling a dedicated mat signals to your brain that it is time to practice).
That is the short answer to how a yoga mat and simple gear lower the barrier to home practice. But the real story goes deeper than equipment lists and material comparisons. The biggest barrier to home yoga is not flexibility, strength, or even knowledge. It is activation energy. The small frictions between thinking about practicing and actually practicing that wear you down before you ever reach the floor.
I have been practicing yoga at home for years, and I have helped dozens of friends and family members start their own routines. The pattern is always the same. People who feel intimidated by studios, unsure of what gear to buy, or convinced they need a dedicated yoga room never get past the thinking stage. Meanwhile, people who just unroll a mat and start moving build habits that last years.
The difference almost always comes down to how much friction stands between the decision to practice and the act of practicing. When you understand how a yoga mat and simple gear lower the barrier to home practice, you realize that the equipment itself is doing psychological work. It is not just cushioning your knees. It is telling your brain that you belong here, that this space is yours, and that starting takes less than 60 seconds.
Think about your own experience. How many times have you thought about doing something healthy and then not done it? The gap between intention and action is where most goals die. For yoga specifically, that gap is filled with questions: Where will I practice? What if I slip? Do I have the right stuff? What if I look silly? A mat and a few props answer all of those questions in one gesture. You unroll the mat, and suddenly the questions do not matter anymore because you are already practicing.
In this article, we will break down exactly why the right mat and a few simple props make home practice dramatically more accessible. We will cover the psychology of barriers, the mat as your foundational piece, the props that make poses achievable, environment and storage strategies, habit-building techniques, and what you genuinely do not need to buy. By the end, you will understand that the barrier to home practice was never about your body. It was about the setup.
Table of Contents
Quick Overview: The Gear That Actually Matters
Before we go deep into the psychology and mechanics, here is the short version. These are the pieces of gear that lower the barrier to home practice the most, ranked by impact:
- A quality yoga mat – The single non-negotiable item. A non-slip surface gives you confidence. Cushioning protects your joints. Unrolling it creates an instant practice space anywhere in your home.
- Two yoga blocks – These make poses accessible regardless of your flexibility level. They bring the floor closer to you, support your back in restorative poses, and eliminate the frustration of not being able to reach.
- A yoga strap – Extends your reach for stretches and deepens poses safely. It replaces the flexibility you have not built yet, letting you practice poses properly instead of forcing your body.
- A blanket or towel – Folds under knees, hips, or head for cushioning. Doubles as a bolster substitute. Absorbs sweat. Costs nothing if you already own one.
That is it. Four items, and one of them is probably already in your closet. Everything else, from bolsters to eye pillows to incense holders, is optional. The gap between “I want to try yoga” and “I am practicing yoga” should be measured in minutes, not shopping trips.
Here is a quick comparison of what a minimal setup looks like versus a full home studio setup:
Minimal Setup: One mat, two blocks (optional for day one), and a blanket from your bed. Total items: 1 to 3. Setup time: 30 seconds. This is enough for 90% of home practices.
Full Setup: Mat, blocks, strap, blanket, bolster, meditation cushion, towel, mat spray, and storage rack. Total items: 8 to 10. Setup time: 2 to 3 minutes. Nice to have but absolutely not required to start.
The point of this comparison is not to discourage you from buying more gear over time. It is to show you that the gap between minimal and full is a gap of comfort and convenience, not a gap of possibility. You can practice with a minimal setup on day one and add props as your practice asks for them. That is how gear lowers barriers. It meets you where you are.
A useful way to think about gear acquisition is in phases. Phase one is the mat alone. You can do sun salutations, standing poses, seated stretches, twists, backbends, and savasana with nothing else. Phase two adds blocks, which unlock supported poses and deeper alignment work. Phase three adds a strap and blanket, which expand your range of accessible stretches. Each phase is complete on its own. You are never practicing with incomplete gear. You are simply adding options as your curiosity grows.
The Psychology of Barriers to Home Practice
Let us talk about what actually stops people from practicing yoga at home. Spoiler: it is almost never the physical challenge. It is the mental friction that builds up between the idea of practicing and the act of doing it. Understanding these barriers is the first step to dismantling them, and simple gear plays a direct role in each one.
The research on habit formation is clear. When an action requires more than about 20 seconds of setup effort, the likelihood that you will do it drops significantly. This is known as the 20-second rule from psychologist Shawn Achor’s work. The more steps between you and the behavior, the less likely you are to follow through. Yoga at home is perfectly positioned to either benefit from or suffer from this principle, depending entirely on how you set up your gear.
Here are the five most common psychological barriers to home practice and how basic equipment addresses each:
Barrier 1: “I am not flexible enough to do yoga”
This is the most common barrier by far. People watch advanced practitioners on Instagram and think yoga is a performance art for the hypermobile. It is not. Yoga is a practice of meeting your body where it is today. But the mental block is real, and it prevents millions of people from ever trying.
The irony is that inflexibility is exactly the reason you should practice. Flexible people do not need yoga to become flexible. They are already there. Yoga is for the stiff, the tight, the people who cannot touch their toes. The practice itself builds flexibility over time. But without props, inflexible beginners often try poses, feel frustrated, and quit before the benefits accumulate.
How gear helps: A strap lets you hold poses that would otherwise be impossible with limited flexibility. Blocks bring the floor to your hands. A cushioned mat means you can kneel and sit without pain. None of these props make the practice easier. They make it possible. And once it is possible, you start. And once you start, flexibility follows.
Barrier 2: “I do not have the right space”
Many people believe they need a dedicated yoga room, a quiet sanctuary, or at minimum a large open living room. They look around their apartment, see furniture and clutter, and conclude that home practice is not realistic for them.
This barrier is based on a misconception about what a yoga space needs to be. Studios are large, open rooms with hardwood floors because they accommodate many people at once. At home, you are one person on one mat. Your space requirements are dramatically smaller than you think.
How gear helps: A yoga mat defines your space temporarily. You do not need a room. You need 24 by 68 inches of floor, which is the size of a standard mat. Unroll it between your coffee table and your couch, practice, then roll it up and put it away. The mat is portable, temporary infrastructure. It creates a practice space out of thin air and then disappears when you are done.
Barrier 3: “I do not know what I am doing”
Beginner anxiety is real. People worry they will practice wrong, hurt themselves, or waste time doing ineffective poses. Without a teacher in the room, the fear of making mistakes feels amplified.
This concern is valid but addressable. You can absolutely learn yoga at home safely, and millions of people do. The key is following reputable video instruction and using props that guide your body into proper positions. Form mistakes happen, but they are rarely dangerous when you are practicing at a beginner level with appropriate modifications.
How gear helps: Props act as silent teachers. A block under your hand in a half-moon pose tells your body what alignment feels like. A strap around your foot in a seated forward fold guides you into the correct position. The gear provides physical feedback that helps you find proper form even without an instructor watching. Add a free YouTube channel like Yoga with Adriene, and you have everything you need for guided, safe home practice.
Barrier 4: “I am not yogi enough”
There is an emotional dimension to this that competitors rarely address. People feel like they need to look the part, dress the part, or have a certain personality to practice yoga. They feel like imposters in their own homes. Reddit threads on home practice are full of people describing this exact feeling.
This is what psychologists call identity friction. You do not see yourself as a “yoga person,” so practicing yoga feels inauthentic. Studio culture can reinforce this feeling with its emphasis on aesthetic clothing, curated spaces, and a particular type of wellness identity. At home, none of that exists. You are just a person on a mat. But the mental barrier persists if you have internalized the idea that yoga requires a certain identity.
How gear helps: Owning a mat makes you a yogi. That sounds simplistic, but the psychology is real. When you have a dedicated tool for the practice, your brain starts to identify you as someone who does yoga. It is the same principle as buying running shoes making you feel like a runner. The gear creates the identity before the habit does, and the habit follows the identity.
Barrier 5: “It takes too long to get started”
When starting practice requires moving furniture, finding a video, changing clothes, gathering props from three different rooms, and clearing mental space, the activation energy is too high. Most people abandon the idea before they begin.
This is the barrier that gear most directly solves. Every piece of gear that lives in an accessible, organized spot removes a step from your startup sequence. And every step removed increases the probability that you actually practice.
How gear helps: When your mat, blocks, and strap live in one accessible spot, getting started takes under a minute. Unroll the mat. Grab the blocks. Press play on a video. You are practicing. The gear reduces the gap between intention and action to almost nothing. This is what I call the unroll threshold, and we will explore it in the next section.
The Yoga Mat Foundation: Why One Piece of Gear Changes Everything
If you take away one idea from this article, let it be this: the yoga mat is the single most important piece of equipment for home practice, and it does far more than provide cushioning. It is the cornerstone of your practice space, your safety net, your psychological trigger, and your portable studio all rolled into one rectangular piece of material.
Understanding how a yoga mat and simple gear lower the barrier to home practice starts with understanding the mat itself. Let us break down why this one item matters so much across multiple dimensions.
The Non-Slip Surface: Confidence on Day One
Reddit users who practice at home consistently say the same thing: a slippery mat kills confidence. When your hands slide in downward dog, your brain registers danger. You tense up, compensate with poor alignment, and start to associate yoga with instability. A good non-slip mat eliminates this entirely.
The grip on a quality mat means you can hold poses without fear of slipping. This changes everything for beginners. Instead of worrying about falling, you can focus on your breath, your alignment, and the sensation of the pose. The surface becomes trustworthy, and trust is the foundation of confidence.
Think about the difference between walking on ice and walking on dry pavement. On ice, every step is tentative. You are thinking about not falling rather than thinking about where you are going. A slippery mat is ice. A grippy mat is pavement. The same poses feel completely different depending on the surface beneath you.
Different materials offer different levels of grip. Natural rubber provides excellent wet and dry traction. Cork mats actually get grippier when damp with sweat. PVC mats offer strong dry grip but can be slippery when wet. TPE mats provide decent grip for beginners at a lower price point. We will cover materials in detail below.
Cushioning: Protecting Your Joints So You Come Back Tomorrow
Beginner bodies are not conditioned for floor work. Kneeling poses, seated folds, and poses that put pressure on wrists and spine can be genuinely uncomfortable on a hard floor. A mat with adequate cushioning absorbs impact and distributes pressure so you can hold poses longer without pain.
This matters more than you might think. Discomfort is a powerful deterrent. If your knees ache every time you practice, your brain starts to associate yoga with pain. That association kills motivation faster than any other factor. A mat that provides even modest cushioning breaks that association before it forms.
Thickness matters here. Standard mats are about 3 to 4 millimeters thick, which works for most practitioners. But if you have sensitive knees, a thin build, or conditions like scoliosis that affect how pressure distributes through your body, a thicker mat (5 to 6 millimeters) provides meaningful relief. Extra-thick mats (8 millimeters or more) can feel luxurious but may reduce stability in standing balance poses because the extra cushioning creates a wobble effect.
The right thickness depends on your body and your practice style. If you are doing gentle yoga, restorative poses, or yin yoga, go thicker. If you are doing vinyasa flow with lots of standing and balancing, stick with standard thickness for stability. There is no wrong answer, only the answer that keeps you comfortable enough to practice again tomorrow.
The Mat Defines Your Space
This is the psychological function of the mat that most people overlook. When you unroll a yoga mat, you are drawing a boundary. This rectangle of material says: inside this space, I am practicing. Outside this space, the rest of my life continues. That boundary, even if it is only psychological, creates a mental separation between practice time and everything else.
In a small apartment, this matters enormously. You may not have a room you can dedicate to yoga. But you have a living room floor that, for 20 minutes, becomes your studio. The mat makes that transformation visible and real. When you roll it up, the studio disappears, and your living room returns. This portability is what makes home practice viable in almost any living situation.
There is a concept in environmental psychology called place attachment. Humans form emotional connections to specific physical spaces. When you practice yoga on the same mat in the same spot day after day, you develop a micro-attachment to that space. The spot itself becomes associated with calm, focus, and self-care. Just seeing the mat can trigger a relaxation response. This is why some practitioners recommend leaving your mat unrolled if space permits. The visual cue becomes a standing invitation.
Experienced home practitioners on Reddit emphasize this point repeatedly. Set up a dedicated space, even if it is just mat-sized. The visual cue of seeing your mat, or knowing exactly where it goes, reduces the decision fatigue that prevents practice.
The Unroll Threshold: Reducing Activation Energy
Here is a concept I want you to take seriously. The unroll threshold is the amount of effort between deciding to practice and actually being on your mat in a starting pose. For most people without a home setup, this threshold is enormous. Find clothes, find a video, clear space, figure out what to do, worry about form. By the time you address all that, the motivation is gone.
A mat that lives in an accessible spot drops the unroll threshold to near zero. You see the mat or know where it is. You grab it, unroll it, and sit down. That is it. You are practicing. The simpler this action becomes, the more likely you are to do it consistently.
Think of it like this: every decision you have to make before practicing is a chance to talk yourself out of it. Where is my mat? Which video should I follow? Do I need to change clothes? Should I eat first? Each question is a micro-decision, and decision fatigue is real. By standardizing your setup and routine, you eliminate these micro-decisions. The mat is always in the same place. The video is always from the same channel. The clothes are whatever you are wearing. No decisions, no friction, just practice.
This is why mat storage matters so much. If your mat is buried in a closet behind winter coats, your unroll threshold is too high. If it lives in a basket next to your couch, on a wall-mounted rack, or under your bed where you can grab it in five seconds, the threshold disappears. We will cover storage solutions in detail later.
Understanding Mat Materials: A Beginner-Friendly Overview
You do not need to become a materials scientist to buy a good mat. But understanding the basic options helps you make a choice that supports your practice instead of undermining it. Here is a plain-language overview of the four most common yoga mat materials:
PVC (Polyvinyl Chloride): The most common and affordable mat material. Provides excellent dry grip and durability. Downsides include environmental concerns (PVC is not biodegradable) and potential slipperiness when wet with sweat. Best for beginners who want a reliable, budget-friendly mat for dry practices.
Natural Rubber: Offers superior grip in both dry and wet conditions. Dense, durable, and provides good cushioning without the wobble of thick foam mats. Downsides include a rubber smell (which fades), heavier weight, and potential latex allergies. Best for practitioners who want serious grip and do not mind a heavier mat.
TPE (Thermoplastic Elastomer): A lightweight, affordable, and relatively eco-friendly option (free of PVC, latex, and rubber). Provides decent cushioning and grip for beginners. Less durable than rubber or PVC and may compress over time. Best for budget-conscious beginners who want a lightweight mat.
Cork: A natural, sustainable material that gets grippier when damp. Provides a firm surface with a unique texture. Often backed with natural rubber for cushioning. Best for practitioners who prioritize eco-friendliness and want a mat that performs well during sweaty sessions.
For most beginners starting a home practice, I recommend either a TPE mat for budget and weight, or a natural rubber mat if you want something that will last years and provide consistent grip. The specific material matters less than the fact that you own a mat and use it. Do not let material research become a barrier to starting.
One more consideration: mat durability. A good mat should last 2 to 5 years with regular home use. Signs that your mat needs replacing include permanent compression (the mat stays flat where your hands and feet go), loss of grip despite cleaning, visible cracking or peeling, and persistent odors that do not respond to washing. Replacing a worn mat is not an expense. It is an investment in continuing to practice safely.
What About Mat Thickness for Specific Needs?
If you have scoliosis or other spinal conditions, mat selection deserves extra attention. Thicker mats (5 to 6 millimeters) provide additional cushioning that helps distribute pressure more evenly along the spine during floor poses and supine positions. Natural rubber mats are often recommended because they offer both cushioning and grip, which helps maintain proper alignment without slipping. Avoid thin travel mats, as they offer minimal joint protection.
For general beginners, a 4 to 5 millimeter mat hits the sweet spot between cushioning and stability. If your knees bother you in kneeling poses, you can always fold your mat over double under your knees, or place a blanket under them. You do not need a specialized mat to solve every comfort issue. That is what props are for.
If you are concerned about wrist pain in poses like plank or downward dog, look for a mat with a denser foam or rubber construction. Softer mats allow your wrists to sink, which can actually worsen discomfort. A firm surface lets you grip and distribute weight through your fingers rather than sinking into the material.
Simple Props That Make Home Practice Accessible
Beyond the mat, a handful of simple props make yoga dramatically more accessible for beginners. These are not luxury items or advanced tools. They are the things that let your body do poses it cannot yet do on its own, which means you can practice the full range of yoga from day one instead of waiting months or years to build enough flexibility and strength.
The philosophy of props in yoga is simple: props do not make the practice easier. They make it correct. A forward fold with a block under each hand is the same pose as a forward fold with hands on the floor. The difference is that the first version is accessible to someone with tight hamstrings, and the second is not. The prop does not change the pose. It changes who can do the pose. That distinction is the entire point of using gear to lower barriers.
Let us look at each prop and the specific barrier it removes.
Yoga Blocks: The Most Underrated Prop for Beginners
If I could recommend one prop beyond the mat, it would be blocks. Two of them. Yoga blocks are rectangular foam, cork, or wooden blocks (typically 9 by 6 by 3 or 4 inches) that you place under your hands, feet, hips, or back to modify poses. They are the single most effective tool for making yoga accessible to inflexible beginners.
Blocks come in three main materials. Foam blocks are the lightest and cheapest, making them ideal for beginners. Cork blocks are denser and provide more stable support but are heavier. Wooden blocks are the firmest and most durable but can be uncomfortable for restorative use. For home practice, foam or cork blocks are the sweet spot.
Here is what blocks actually do for your practice:
They bring the floor closer. In standing forward folds, half-moon pose, or triangle pose, blocks under your hands let you maintain proper spinal alignment even if you cannot reach the floor. Without blocks, you compensate by rounding your back or bending your knees excessively. With blocks, you get the intended stretch and build toward the full pose over time.
They provide support in restorative poses. A block under your sacrum in bridge pose turns it into a supported, restorative posture you can hold for minutes. A block between your knees in savasana helps relax your hips. Blocks under your thighs in child’s pose make the pose accessible for larger bodies or stiff hips.
They build strength and balance. Using blocks in plank pose or downdog can challenge your stability in productive ways. Standing on a block in balancing poses changes the difficulty level. They are not just for making things easier. They are tools for exploring poses more deeply.
Reddit users frequently mention that beginners skip blocks because they feel like a crutch. This is backwards. Blocks are a bridge. They let you practice the shape of a pose correctly while your body develops the flexibility to do it without support. Every experienced yoga teacher uses blocks. They are not a sign of weakness. They are a sign of intelligence.
Yoga Strap: Replacing the Flexibility You Have Not Built Yet
A yoga strap is a simple woven belt, typically 6 to 8 feet long, with a buckle or D-ring at one end. Its primary function is to extend your reach. If you cannot grab your foot in a seated forward fold, you loop the strap around your foot and hold the other end. The strap bridges the gap between your hand and your foot so you can practice the stretch correctly.
Straps are one of the most affordable yoga props you can buy. They are also one of the most effective. The difference between a strap and no strap for a tight-bodied beginner is the difference between doing a pose correctly and not doing it at all.
Here is what a strap does for home practice:
It makes hamstring and shoulder stretches accessible. Tight hamstrings are the most common flexibility limitation in beginners, and they affect dozens of poses. A strap lets you lie on your back, loop the strap around your foot, and extend your leg upward for a deep hamstring stretch without straining your back or forcing the reach.
It helps with shoulder opener poses. Gomukhasana (cow face pose) requires reaching one arm behind your back and the other over your shoulder to clasp hands. Most beginners cannot do this. A strap lets you hold both ends and gradually walk your hands closer over weeks and months.
It teaches proper alignment. By holding a strap in poses where your hands are supposed to be together or in a specific position, you learn what correct alignment feels like. Your body remembers that sensation and carries it into your practice over time.
It serves as a posture aid. Looping a strap around your upper arms in plank or downward dog can prevent your elbows from splaying outward. This is a subtle but powerful use that most beginners never discover on their own.
A strap costs very little and takes up almost no space. It can live in a drawer, rolled up with your mat, or even in your bag for travel. If blocks are the most underrated prop, the strap is the most overlooked one. Together, a mat, two blocks, and a strap give you everything you need for a complete home practice.
Yoga Blanket: The Multi-Purpose Comfort Tool
A yoga blanket is simply a firmly woven, foldable blanket (traditionally made of Mexican cotton or wool). It is the most versatile prop in your kit because it can serve so many functions. If you do not want to buy a specialized yoga blanket, a thick, firmly woven throw blanket or even a folded beach towel works fine.
Here is how a blanket supports home practice:
It adds cushioning under sensitive joints. Folded once or twice, a blanket under your knees in low lunge or camel pose provides cushioning that even a thick mat cannot match. Folded and placed under your sit bones in seated poses, it tilts your pelvis forward and makes sitting with a straight spine dramatically easier.
It acts as a bolster substitute. Rolled tightly, a blanket can support your spine in restorative backbends or elevate your legs in legs-up-the-wall pose. You do not need a dedicated bolster if you have a blanket and know how to fold it.
It provides warmth during savasana. Final relaxation is where your body temperature drops, and a blanket over your body helps you stay warm and comfortable. This is a small detail, but it makes the difference between a restful savasana and a shivering one.
The folding technique matters. A blanket folded neatly provides firm, even support. A blanket crumpled up provides uneven, unreliable support. Learn to fold your blanket in halves and thirds to create different thicknesses for different uses. This is a 30-second skill that multiplies the usefulness of the prop.
Bolsters and Other Props: Optional but Nice
A yoga bolster is a firm, cylindrical or rectangular cushion used primarily in restorative and yin yoga. It provides support for deep, long-held poses where the goal is relaxation rather than effort. Bolsters are wonderful, but they are also bulky, relatively expensive, and not necessary for a beginning home practice.
If you want bolster-like support without buying one, fold a blanket or stack two pillows. A firm couch cushion can work in some poses. The point is that props exist to solve problems, and if you can solve the problem with something you already own, you do not need to buy the specialized version.
Other props you may encounter include yoga wheels (for backbends and massage), sandbags (for weight and grounding in restorative poses), and eye pillows (for savasana). All of these are legitimately useful for specific practices, but none are needed to start. If your practice eventually asks for one of these props, you will know. Until then, save your money.
Why a Towel on Your Mat?
You might see practitioners placing a towel over their mat and wonder why. There are several practical reasons. During hot or sweaty practice, a towel absorbs moisture and provides additional grip, especially on mats that become slippery when wet. A towel adds an extra layer of cushioning for sensitive joints. It also serves a hygiene function, creating a barrier between you and the mat surface between washes. Some practitioners use a towel simply to protect their mat from wear during particularly intense sessions.
For home practice, a regular towel is usually sufficient. Specialized yoga towels with silicone grips or dot patterns are designed for hot yoga and provide superior grip when soaked with sweat. If you are not doing hot yoga at home, a standard towel handles all of these functions at no additional cost.
The Environment Factor: Space, Storage, and Shared Walls
Where you store your yoga mat and how your practice space is set up has a direct impact on whether you practice consistently. The environment factor is about making the physical act of starting as frictionless as possible. This is where gear meets lifestyle, and small decisions about storage and space make a big difference in your consistency.
Where to Keep Your Yoga Mat at Home
Mat storage is not a minor detail. It is a strategic decision that affects your unroll threshold every single day. Here are the best storage options, ranked by accessibility:
Wall-mounted mat rack: Keeps your mat visible and accessible. Takes up zero floor space. You see your mat every time you walk by, which serves as a visual reminder to practice. Best for motivation.
Under the bed: Keeps the mat out of sight but easy to grab. Works well in small spaces. Roll the mat loosely to prevent permanent curling. Slide it out and unroll it in seconds.
Vertical storage basket or umbrella stand: A tall basket in the corner of your living room or bedroom holds your mat upright along with your strap and blocks. Everything in one place, accessible, and visually tidy.
Behind a door: A mat strap or over-the-door hook holds your mat flat against the door surface. Invisible when the door is open, accessible when you need it.
Dedicated shelf: If you have a bookshelf or storage unit, dedicating one shelf to your yoga gear keeps everything together. Blocks, strap, blanket, and mat all live in one spot.
The principle is simple: store your mat where you can grab it in under five seconds. If it takes longer than that to retrieve your mat, the storage location is adding friction to your practice. Move it closer.
Consider storing all your yoga gear together in one spot. When your mat, blocks, strap, and blanket all live in the same basket or on the same shelf, grabbing everything you need takes one motion. This is what experienced practitioners call a practice station. It is the physical equivalent of having your running shoes, headphones, and water bottle by the door. Everything ready, everything together, zero hunting.
One important note on mat care: store your mat in a cool, dry place away from direct sunlight. Prolonged sun exposure degrades most mat materials, causing them to become brittle or lose their grip. Rolled loosely rather than tightly helps preserve the mat’s flatness and prevents the edges from curling up during practice.
Practicing in Small Spaces and Apartments
You do not need much space for home practice. A standard yoga mat is 24 inches wide and 68 inches long (extra-long mats are 72 inches). That is roughly 2 by 5.7 feet. Almost every home, apartment, or dorm room has that much floor space available somewhere.
The challenge in small spaces is not the mat itself but the surrounding area. You need room to extend your arms to the sides in poses like warrior II or triangle. You need clearance above for reaching upward. And you need to move any furniture that might interfere with your practice area.
Here is how to make small-space yoga work:
Practice between furniture. Slide your coffee table to one side and unroll your mat in the living room. The gap between your couch and your TV stand is probably wide enough. Practice facing the TV so you can follow along with a video.
Practice in the bedroom. The floor next to your bed is often the most private, quietest space in a shared home. You can close the door, and the bed itself provides a reference point for poses done on your mat.
Practice facing different directions. If your arms cannot extend fully to the sides in warrior II, practice the pose facing forward or at an angle. Modify the arm position (hands on hips or shorter arm reach) to accommodate the space. The pose still works.
Use your walls. Wall space is one of the most underused props in home practice. A wall provides support in balancing poses like tree pose or half-moon. It helps you align in poses like downward dog (walk your hands up the wall for a modified version). And it serves as a reference point for maintaining your mat’s position during practice.
The beauty of apartment yoga is that it teaches you to be creative. When space is limited, you learn to modify, adapt, and work with what you have. These are valuable yoga skills that transfer to every aspect of your practice. A practitioner who can adapt to a small space can adapt to anything.
Noise and Shared Walls
If you live in an apartment with shared walls or downstairs neighbors, noise is a legitimate concern. Yoga is generally a quiet practice, but certain movements, like jumping back from forward fold to plank, or dropping into chaturanga, can generate thuds that travel through floors.
A thicker mat absorbs some impact and reduces noise transmission. Practicing barefoot eliminates the sound of shoes on hard floors. Avoiding jumping transitions keeps things quiet. And choosing practice times that respect your neighbors, mid-morning or early evening rather than 6 AM or 11 PM, goes a long way.
If you share walls with neighbors, the mat also serves as an acoustic buffer. A mat on a hard floor dampens the sound of your body moving, which makes your practice less noticeable to people on the other side of the wall. This is a small benefit that contributes to your sense of privacy and comfort during practice.
For practitioners in upstairs apartments, consider placing your mat on the quietest part of your floor. Areas over load-bearing walls tend to transmit less noise than the center of a room. An area rug under your mat adds another layer of sound dampening. These are small adjustments, but they remove the worry that your practice is disturbing others.
Building Your Practice Habit: From Gear to Consistency
Having the right gear is necessary but not sufficient. The real magic happens when your low-friction setup translates into consistent daily practice. This is where we move from equipment to habit, and where the choices you made about your mat, your props, and your space start paying dividends.
The people who maintain a home practice for years are not the ones with the most willpower. They are the ones who have made practicing so easy and automatic that skipping it feels stranger than doing it. Here is how to get there.
Start Small: The 10-Minute Practice
Reddit users who successfully built home yoga routines almost universally recommend starting with 10 to 15 minute sessions. Not hour-long practices. Not ambitious 30-day challenges. Just 10 minutes on the mat, consistently, until it becomes automatic.
Ten minutes is long enough to feel meaningful. It is short enough that you cannot talk yourself out of it. And it is achievable on your worst days, which means you never break the chain of consistency. Once 10 minutes feels automatic, you can extend naturally. But the initial goal is not duration. It is frequency.
This aligns with what behavioral scientists call minimum viable habit formation. The goal in the first weeks is not to have great yoga sessions. The goal is to prove to yourself that you can show up. A 10-minute session where you mostly sit and breathe counts as much as a 45-minute vinyasa flow. Both are evidence that you are a person who practices yoga. That evidence is what builds the identity that sustains the habit.
Here is a simple 10-minute home practice you can do with just a mat:
Minute 1-2: Sit on your mat in a comfortable cross-legged position. Breathe slowly through your nose. Set an intention for your practice.
Minute 2-4: Cat-cow stretches on hands and knees. Move with your breath, arching and rounding your spine. Five to eight rounds.
Minute 4-6: Downward dog to child’s pose. Hold each for three to five breaths. Alternate three times.
Minute 6-8: Low lunge (each side), then cobra pose or sphinx pose for a gentle backbend. Hold each for three to five breaths.
Minute 8-9: Lying spinal twist (each side). Let gravity do the work. Breathe deeply.
Minute 9-10: Savasana. Lie flat on your back, arms at your sides, eyes closed. Let your body relax completely. This is the most important pose in your practice.
That is a complete yoga practice. It touches every major movement pattern, it is accessible to beginners, and it requires nothing but a mat. Once you can do this consistently, you can follow along with longer videos and explore more poses.
If you have blocks and a strap, you can expand this routine. Add a supported bridge pose with a block under your sacrum. Use the strap for a lying hamstring stretch. Place blocks under your hands in a standing forward fold. But none of these additions are necessary. They are options, not requirements. The mat alone is enough.
Habit Stacking: Attach Practice to Something You Already Do
Habit stacking is the practice of attaching a new habit to an existing one. Instead of saying “I will practice yoga every day,” you say “I will practice yoga right after I pour my morning coffee.” The existing habit (making coffee) becomes the trigger for the new habit (unrolling your mat).
This technique works because existing habits are already wired into your brain. By attaching a new behavior to an established one, you piggyback on existing neural pathways rather than building entirely new ones. The coffee becomes a reminder. The smell, the warmth, the routine of making it, all become cues that say “time to practice.”
Here are some effective habit-stacking combinations for home yoga:
Practice after your morning coffee or tea. The warm drink signals the start of your day, and a short practice extends that ritual. Many Reddit users describe this as their most effective habit trigger.
Practice before bed. Instead of scrolling your phone in bed, unroll your mat and do 10 minutes of gentle stretching. This improves sleep quality and creates a calming bedtime routine.
Practice after work, before you sit on the couch. The transition from work mode to home mode is a natural trigger. If you get on your mat before you settle into the couch, you catch yourself before the inertia of the evening takes over.
Practice after a shower. A warm shower loosens muscles and creates a natural transition into physical activity. Plus, you are already in a body-aware state, which makes the mental shift to yoga easier.
The key is to choose a trigger that happens at the same time every day and that you already do without thinking. The habit stack creates automaticity, and automaticity creates consistency.
Avoid the common trap of trying to practice at a specific time without a trigger. “I will practice at 7 AM” is harder to maintain than “I will practice right after I brush my teeth.” The first requires you to remember and decide. The second happens automatically because brushing your teeth is already automatic.
Staying Motivated Without a Teacher
One of the biggest challenges of home practice is the lack of external accountability. No one is expecting you to show up. No one will notice if you skip a day. This freedom is one of the best things about home practice, but it can also be one of the hardest things to manage.
Here is what experienced home practitioners recommend for staying motivated:
Follow a YouTube channel you genuinely enjoy. Yoga with Adriene is the most commonly recommended free resource on Reddit, and for good reason. Her approach is welcoming, non-judgmental, and designed for home practitioners of all levels. Having a familiar teacher on screen provides guidance and companionship without the pressure of a studio environment.
Track your practice. Keep a simple calendar where you mark each day you practice. You do not need to write details. Just a checkmark. The visual chain of marks becomes its own motivation as you build momentum.
Practice in comfortable clothes. One of the most liberating aspects of home yoga is that you can practice in pajamas, sweatpants, or whatever you are already wearing. Removing the “I need to change into yoga clothes” step eliminates another friction point. Reddit users mention this repeatedly as a barrier that studios impose and home practice removes.
Let go of perfection. Some sessions will feel amazing. Others will feel stiff, distracted, or short. Both count. The goal is not a perfect practice. The goal is showing up. Imperfect practice is still practice, and the cumulative effect of showing up consistently is far more powerful than the occasional perfect session.
Record yourself occasionally. Without a teacher to correct your form, video is your best feedback tool. Prop up your phone, record a sun salutation, and watch it back. You will notice things about your alignment that you cannot feel from inside the pose. This is how you learn form-checking at home.
Remember that home practice is good enough. Reddit threads on this topic are unanimous: experienced practitioners say home yoga is genuinely effective, especially when combined with occasional workshops or classes. You do not need a studio to build strength, flexibility, and mindfulness. You need a mat and the willingness to unroll it.
What You Really Don’t Need (and Why That Matters)
One of the most barrier-reducing things you can learn is what you do not need. The fitness and wellness industries excel at making people feel like they need to buy more things before they can start. This is especially true in yoga, where the range of available props, clothing, and accessories is overwhelming.
Let me be direct. Here is what you do not need to start a home yoga practice:
You do not need specialized yoga clothing. Any comfortable clothing you can move in works. Sweatpants, shorts, leggings, pajamas. The clothing does not affect your practice. The only consideration is that very loose shirts can fall over your head in inversions or downward dog, so fitted or semi-fitted tops are slightly more practical.
You do not need a yoga towel. A regular hand towel or bath towel works for absorbing sweat, adding cushioning, or providing extra grip. Specialized yoga towels with grip dots or silicone nubs are nice for hot yoga but unnecessary for most home practice.
You do not need a yoga mat bag. A strap, a tote, or simply carrying your rolled mat under your arm works fine. Mat bags are convenient for transport to a studio, but at home, your mat lives in one spot and does not need a bag.
You do not need a meditation cushion. A folded blanket under your sit bones accomplishes the same thing. If you develop a long sitting meditation practice, a cushion (zafu) is a worthwhile investment. But it is not needed for yoga practice.
You do not need an eye pillow. A small towel over your eyes in savasana works just as well. Eye pillows are lovely, but they are a comfort enhancement, not a practice necessity.
You do not need incense, candles, singing bowls, or a speaker system. These create ambiance, and if they enhance your enjoyment, that is wonderful. But they are accessories, not prerequisites. Do not let the absence of ambiance prevent you from practicing.
You do not need a full set of props on day one. Start with a mat. If you discover you need blocks for a specific pose, get blocks. If a strap would help your stretching, get a strap. Let your practice tell you what it needs rather than buying everything upfront and feeling overwhelmed by the pile of equipment.
This anti-overbuying message is not about deprivation. It is about removing the shopping barrier. When people think they need to spend hundreds of dollars on equipment before they can start, many never start. The truth is that a single mat and a free YouTube channel are enough to build a practice that transforms your flexibility, strength, and mental wellbeing.
And yes, for the crocheters and knitters reading this: you can absolutely use a yoga mat as a blocking mat for your finished projects. The foam surface holds pins well, and the cushioning lets you shape and stretch your work. This is not yoga advice, but it is a handy bonus use for your mat between sessions.
The deeper point here is about the relationship between gear and practice. Gear should serve the practice, not precede it. The moment you find yourself shopping for things you do not yet need, you have swapped practicing for preparing to practice. Catch yourself. Unroll the mat. Start where you are with what you have.
FAQs
What yoga mat is best for scoliosis?
For scoliosis, thicker mats (5 to 6 millimeters) provide extra cushioning that distributes pressure more evenly along the spine during floor poses. Natural rubber mats are often recommended because they offer both cushioning and reliable grip, which helps maintain proper alignment. Avoid thin travel mats, as they offer minimal joint protection for sensitive areas of the back.
Where should I keep my yoga mat at home?
Store your yoga mat in a cool, dry place away from direct sunlight. The best options include a wall-mounted rack for visibility and motivation, under your bed for quick access, a vertical basket in the corner of your living room, or on a dedicated shelf. The key principle is keeping your mat where you can grab it in under five seconds to minimize friction between deciding to practice and actually starting.
Why would I put a towel on my yoga mat?
A towel on your yoga mat serves several purposes: it absorbs sweat and provides extra grip during hot or vigorous practice, adds cushioning for sensitive joints, protects the mat surface from wear, and creates a hygienic barrier between you and the mat between cleanings. A towel is especially useful on PVC mats that become slippery when wet.
Can you use a yoga mat for blocking?
Yes, a yoga mat can double as a blocking mat for crochet and knitting projects. The foam surface holds T-pins securely, and the cushioning allows you to stretch and shape finished garments or blankets into their proper dimensions. It is a handy bonus use for your mat between yoga sessions.
Can I do yoga at home without a mat?
Yes, you can practice yoga without a mat on carpet, grass, or a soft rug, but it is not recommended for hard floors. Without a mat, you risk slipping during poses like downward dog, and hard surfaces can cause discomfort in kneeling and seated positions. A mat provides grip, cushioning, and a defined practice space. If you cannot get a mat immediately, start on carpet or use a folded blanket as a temporary surface.
Do I need yoga blocks as a beginner?
Yoga blocks are not required on day one, but they are the most highly recommended prop for beginners. Blocks bring the floor closer to your hands in standing poses, provide support in restorative poses, and help you practice correct alignment before your flexibility fully develops. You can start with just a mat and add blocks once you encounter poses where they would help.
How often should a beginner practice yoga at home?
Beginners should aim for 3 to 5 short sessions per week, starting with 10 to 15 minutes each. Consistency matters far more than duration. Practicing for 10 minutes four times a week is more effective than one 60-minute session. Once short sessions feel natural, gradually increase duration and frequency based on how your body responds.
Conclusion: The Barrier Was Never Your Body
If you take one thing from this guide on how a yoga mat and simple gear lower the barrier to home practice, let it be this: the barrier was never your flexibility, your strength, or your experience level. The barrier was friction. Mental friction that told you that you were not ready. Environmental friction that made starting feel complicated. Physical friction that made practice uncomfortable on a hard floor.
A yoga mat addresses all three. It gives you grip so you feel safe. It gives you cushioning so you feel comfortable. It gives you a defined space so you feel like a practitioner. And when it lives in an accessible spot, it drops the time between deciding to practice and actually practicing to under 60 seconds.
Add two blocks and a strap, and you have everything you need to practice the full range of yoga poses safely and effectively, regardless of your current flexibility level. You do not need a studio. You do not need expensive clothing. You do not need a dedicated room. You need a mat and the willingness to unroll it.
So go unroll it. Right now. Ten minutes on the mat today is worth more than a perfect hour-long session you keep planning for next week. The gear is ready. The barrier is gone. The only thing left is to start.